Eject pod: Difference between revisions
Nightflame (talk | contribs) (AC02 update) |
|||
| (11 intermediate revisions by 2 users not shown) | |||
| Line 1: | Line 1: | ||
{{Academy index}} | {{Academy index}} | ||
::''Abbreviation: Pod | |||
__NOTOC__ | __NOTOC__ | ||
You are placed in an eject pod whenever your ship is destroyed or you rejoin a game that you exited | You are placed in an eject pod whenever your ship is destroyed or you rejoin a game that you exited (unless eject pods have been turned off in the game options, which is uncommon). If your eject pod is destroyed then you will respawn at the nearest station but your [[kill bonus]] will be reset to zero (and your number of lives reduced by one if playing with limited lives, which is uncommon). | ||
You have | You have 3 minutes of oxygen to get back to base. Docking at any friendly station, being picked up by a friendly pilot, or flying into a friendly [[carrier|carrier drone]] will save you from asphyxiation. Some [[factions]] have engineered pod retrieval systems into refineries and teleport receivers, which can not normally dock ships. By default pressing {{k|z}} {{k|p}} will engage autopilot to the nearest point of rescue. | ||
A pilot in an eject pod is completely useless to his own team. If your kill bonus is low | A pilot in an eject pod is completely useless to his own team. If your kill bonus is low or the trip home is long, it is sometimes more tactically sensible to suicide your own pod than float home. Your best bet is to ram an enemy ship (aim for big, slow moving ones) or driving through enemy mines. Note that ramming asteroids and enemy stations will <u>not</u> damage your pod. | ||
As | As an unpodded pilot you want to rescue as many friendly pods as possible, to keep your team's manpower at maximum. Similarly you want to stop enemy pods from being rescued, if possible. | ||
*Select friendly pods using the mouse then use the [[voice chat]] {{k|~ cs}} to send "I've gotcha, hold still". | *Select friendly pods using the mouse then use the [[voice chat]] {{k|~ cs}} to send "I've gotcha, hold still". | ||
*Use {{k|~ cn}} to send "Don't kill pods!" | *Use {{k|~ cn}} to send "Don't kill pods!" | ||
| Line 14: | Line 15: | ||
==Ship statistics== | ==Ship statistics== | ||
''Information taken from | ''Information taken from AC02. Values are representative only (many [[factions]] have had their ships individually tweaked for balance).'' | ||
<h5 style="text-align: center;">Eject pod</h5> | <h5 style="text-align: center;">Eject pod</h5> | ||
[[Image:ap_lifepod.jpg | {{center|[[Image:ap_lifepod.jpg|Eject pod icon]]}} | ||
| Line 29: | Line 30: | ||
|rowspan=50 colspan=2|N/A | |rowspan=50 colspan=2|N/A | ||
|- | |- | ||
|Hitpoints || | |Hitpoints || 50 | ||
|Max thrust || 150 | |Max thrust || 150 | ||
|- | |- | ||
| Line 36: | Line 37: | ||
|- | |- | ||
|Scan || 200 | |Scan || 200 | ||
|Max speed || | |Max speed || 80 | ||
|- | |- | ||
|Signature || | |Signature ||50% | ||
|Turn rate || 0.7 | |Turn rate || 0.7 | ||
|- | |- | ||
| || || | | || ||Torque-weight ratio || 1.7 | ||
|} | |} | ||
::*Pods can be picked up by any friendly ship except for [[miner]]s, [[constructor]]s, and [[tower]]/[[caltrop]] builders. | |||
::*Pods can normally only dock at [[station]]s that have a green door. | |||
<br><br> | |||
== | ==Factions== | ||
== | {|cellpadding=7 | ||
|- | |||
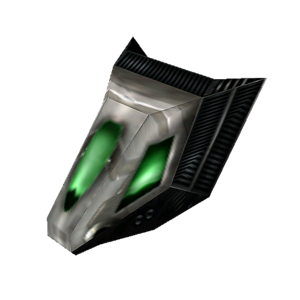
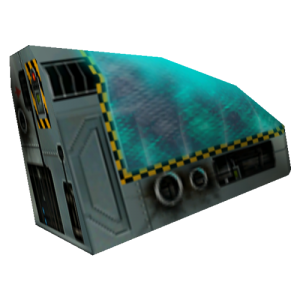
|align="center"|[[File:Bios-pod.jpg|thumb|center|Bios pod]] | |||
|valign="top"|<br> | |||
'''Bios | |||
*Can rip to any [[teleport receiver]], meaning [[Bios]] pilots can fly more offensively and not worry about being out of the action for too long. | |||
|- | |||
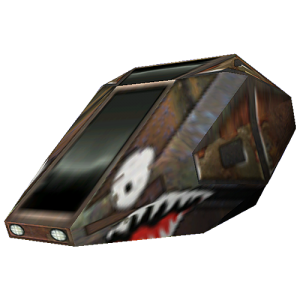
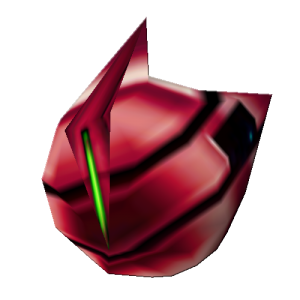
|[[Image:BeltsPod.png|thumb|center|Belters pod]] | |||
|valign="top"|<br> | |||
'''Belters | |||
*{{NS}} | |||
|- | |||
|[[File:Dreg-pod.jpg|thumb|center|Dreghklar Empire pod]] | |||
|valign="top"|<br> | |||
'''Dreghklar Empire | |||
*{{NS}} | |||
|- | |||
|[[File:Gt-pod.jpg|thumb|center|Ga'Taraan Federation pod]] | |||
|valign="top"|<br> | |||
'''Ga'Taraan Federation | |||
*{{NS}} | |||
|- | |||
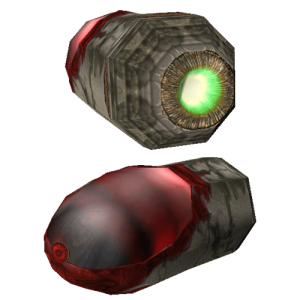
|[[File:Giga-pod.jpg|thumb|center|GigaCorp pod]] | |||
|valign="top"|<br> | |||
'''GigaCorp | |||
*Can dock at any [[GigaCorp]] [[base]]. | |||
|- | |||
|[[File:Rix-pod.jpg|thumb|center|Rixian Unity pod]] | |||
|valign="top"|<br> | |||
'''Rixian Unity | |||
*{{NS}} | |||
|- | |||
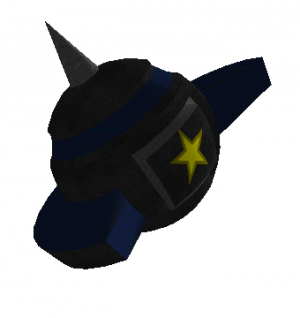
|[[File:Ic-pod.jpg|thumb|center|Iron Coalition pod]] | |||
|valign="top"|<br> | |||
'''Iron Coalition | |||
*Can dock at any [[IC]] base. | |||
|- | |||
|[[File:Tf-pod.jpg|thumb|center|Technoflux pod]] | |||
|valign="top"|<br> | |||
'''Technoflux | |||
*Can dock at any [[TF]] base. | |||
*Can be picked up by [[TF]] [[constructor]]s. | |||
|- | |||
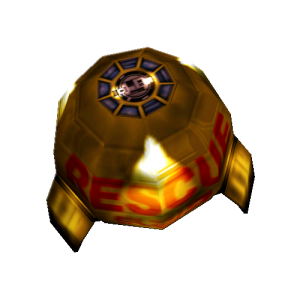
|[[File:OH-pod.png|thumb|center|Omicron pod]] | |||
|valign="top"|<br> | |||
'''Omicron Hive | |||
*{{NS}} | |||
|- | |||
|[[File:Nix-escapepod.png|thumb|center|Phoenix pod]] | |||
|valign="top"|<br> | |||
'''Phoenix | |||
*{{NS}} | |||
|- | |||
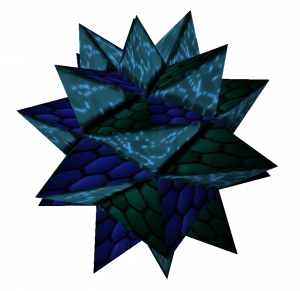
|[[File:Drac-pod.png|thumb|center|Draconium pod]] | |||
|valign="top"|<br> | |||
'''Draconium | |||
*{{NS}} | |||
|} | |||
==See also== | ==See also== | ||
*[[Why do people tell me not to kill pods?]] | *[[Why do people tell me not to kill pods?]] | ||
*[[Kill bonus]] | *[[Kill bonus]] | ||
[[Category:Small and medium class ships]] | |||
Latest revision as of 01:49, 20 January 2020
| ALLEGOPEDIA | |
| About | History |
| FACTIONS | |
| Belters | Bios |
| Dreghklar | Ga'Taraan |
| GigaCorp | Iron Coalition |
| Omicron Hive | Rixian Unity |
| Technoflux | Draconium |
| Phoenix | Valkyrie |
| SHIPS | |
| Buying Ships | |
| Small Class | |
| Eject Pod | Interceptor |
| Fighter | Scout |
| Stealth Fighter | Other Small Ships |
| Medium Class | |
| Bomber | Fighter Bomber |
| Gunship | Stealth Bomber |
| Troop Transport | Other Medium Ships |
| Capital Class | |
| Assault Ship | Attack Carrier |
| Battlecruiser | Battleship |
| Corvette | Cruiser |
| Destroyer | Devastator |
| Freighter | Frigate |
| Other Capital Ships | |
| Ship Equipment | |
| Dispenser Items | Missiles |
| Weapons | Other Equipment |
| AI Drone Ships | |
| Carrier | Caltrop |
| Constructor | Miner |
| Tower | Other Drones |
| BASES | |
| Buying Bases | |
| Minor Bases | |
| Outpost | Refinery |
| Teleport Receiver | Other Minor Bases |
| Special Bases | |
| Garrison | Shipyard |
| Technology Bases | |
| Expansion Complex | Supremacy Center |
| Tactical Laboratory | Other Tech Bases |
- Abbreviation: Pod
You are placed in an eject pod whenever your ship is destroyed or you rejoin a game that you exited (unless eject pods have been turned off in the game options, which is uncommon). If your eject pod is destroyed then you will respawn at the nearest station but your kill bonus will be reset to zero (and your number of lives reduced by one if playing with limited lives, which is uncommon).
You have 3 minutes of oxygen to get back to base. Docking at any friendly station, being picked up by a friendly pilot, or flying into a friendly carrier drone will save you from asphyxiation. Some factions have engineered pod retrieval systems into refineries and teleport receivers, which can not normally dock ships. By default pressing z p will engage autopilot to the nearest point of rescue.
A pilot in an eject pod is completely useless to his own team. If your kill bonus is low or the trip home is long, it is sometimes more tactically sensible to suicide your own pod than float home. Your best bet is to ram an enemy ship (aim for big, slow moving ones) or driving through enemy mines. Note that ramming asteroids and enemy stations will not damage your pod.
As an unpodded pilot you want to rescue as many friendly pods as possible, to keep your team's manpower at maximum. Similarly you want to stop enemy pods from being rescued, if possible.
- Select friendly pods using the mouse then use the voice chat ~ cs to send "I've gotcha, hold still".
- Use ~ cn to send "Don't kill pods!"
Ship statistics
Information taken from AC02. Values are representative only (many factions have had their ships individually tweaked for balance).
Eject pod
| Ship | Handling | Equipment | |||
| Armor class | Light | Mass | 10 | N/A | |
| Hitpoints | 50 | Max thrust | 150 | ||
| ECM | 1 | Power-weight ratio | 15 | ||
| Scan | 200 | Max speed | 80 | ||
| Signature | 50% | Turn rate | 0.7 | ||
| Torque-weight ratio | 1.7 | ||||
- Pods can be picked up by any friendly ship except for miners, constructors, and tower/caltrop builders.
- Pods can normally only dock at stations that have a green door.
Factions
Bios
| |
Belters
| |
Dreghklar Empire
| |
Ga'Taraan Federation
| |
GigaCorp | |
Rixian Unity
| |
Iron Coalition
| |
Technoflux
| |
Omicron Hive
| |
Phoenix
| |
Draconium
|
